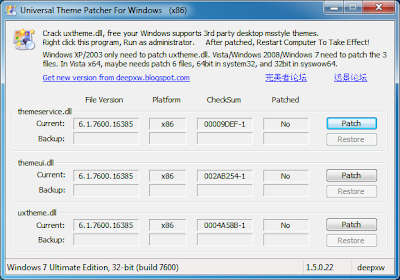
"Universal Theme Patcher" is an exellent Tool for patching themes. it supports Windows XP SP2/Sp3, Server 2003, Vista SP1/SP2, Server 2008 And Windows7. used on both 32bit and 64bit computer. This tool will patch following 3 system files.
- uxtheme.dll
- themeui.dll
- themeservice.dll
1>First Download Universal Theme Patcher
2> Then Run Universal Theme Patcher then it will ask you to choose language
then click ok.
3> Now you'll see the main interface of this tool. you just need to click on the "Patch" button
given for each file.
4> After "Patch" restore button get activated to restore file in future.
5> Then restart your computer.
6> Then you can find many 3rd party/Custum themes on internet you can search on google and download themes
7> Then simply copy the .theme file and its theme folder to "%windir%\Resources\Themes" folder
(where %windir% means "Windows" directory present in system drive where Windows 7 is installed.
Most probably C: drive). Now double-click on .theme file and it'll apply the theme
or you can apply it using Desktop Personalization window. Done


No comments:
Post a Comment